The Transcription Team and Photo Restoration
The Transcription Team consists of volunteers from around Australia who type up old documents, gazettes, newspapers and other articles. This work is invaluable to researchers and historians as it creates searchable documents which can be indexed by Google and other search engines.
In the past, trawling through microfiche at the library took many many hours. Now, a quick 5 minute search of a document can reveal all references to a family name or subject matter.
Much gratitude is extended to the dedicated team who make this possible. Thousands of hours have been committed to accurate and faithful transcriptions of documents and TROVE newspapers. Two examples of their acheivements are The Triangle Newspaper and Snapshot 1964.
Many of the team members use their hours to fulfil their Centrelink Mutual Obligation, using their time and skills to preserve our history and enhance your research experience. Please email admin@coraki.town if you are interested in joining the team.
Photos: digitising and restoring
You don’t have to be a museum archivist to look after your old photos properly.
Most people have an old showbox of photos – inherited from deceased relatives – that “one day” they will deal with. One day never comes and they languish in the cupboard and often deteriorate with damp and dust.
For professionals the steps are: rescue; scan; store; catalogue; restore.
You don’t have to tackle it all at once – but a few easy steps will get you started.
Firstly rescue them from further deterioration – PARTICULARLY if they have been stored in those 1970s sticky albums.
Next, scan them at a HIGH resolution and save them as tif format. There are hundreds of videos on the internet to give you all the details on how to accomplish this but if you don’t have the time and equipment, send them to a professional or ask a teenager. Just do this one really important step!
I can’t tell you how many people came to me after the 2022 flood to try and rescue their precious memories. It was heartbreaking.
Once they are scanned, save them to a second backup hard disk and keep it off-site at your mums or neighbour’s place.
The other steps can wait until you have more time – just get them digistised!
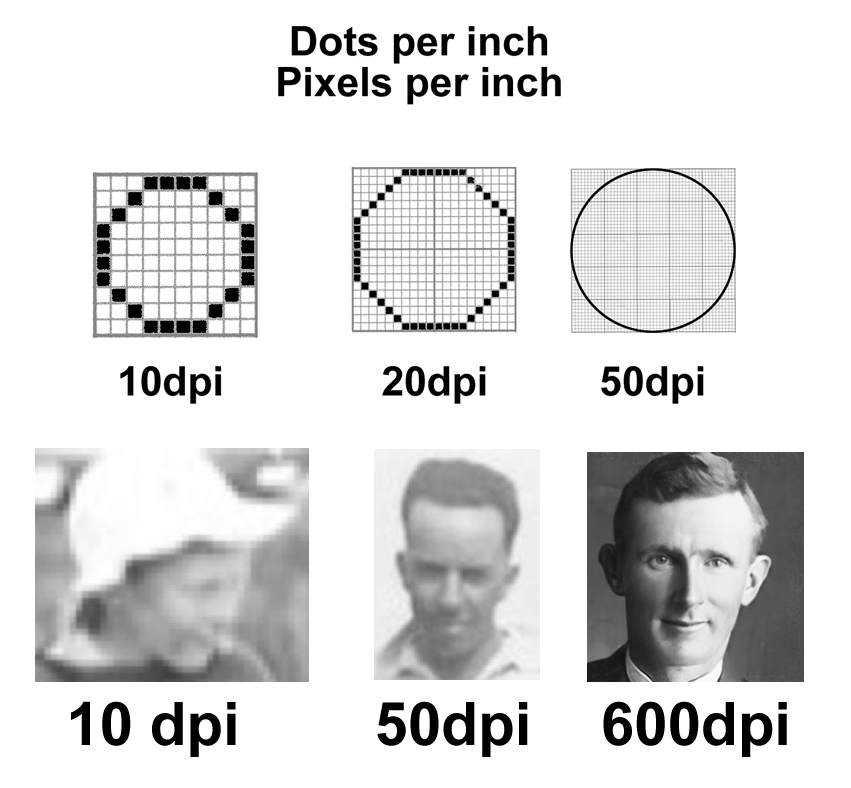
A few words about resolution
Resolution is all about dots per inch – DPI
The higher the dpi, the more information the scanner will pick up and the clearer the image.
Scan at 600 dpi or above. You can always make a hi-res scan smaller but you cannot make a lo-res scan bigger without a significant deterioration in quality.
The higher the resolution – the higher the file size.
A photo scanned at 100dpi might be 1 megabyte.
Scanned at 600dpi will be 6 megabytes.
Restoring is the fun part. Yes, it requires graphic skills but to watch a repaired photo emerge from the chaos is very satisfying.

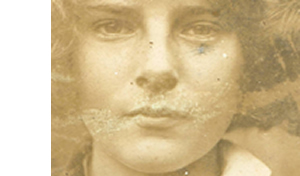
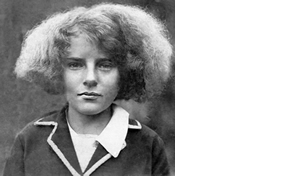
A word of warning about allowing artificial intelligence [AI] to automatically “improve” your photos. DON’T!!
Some scanners now try to apply filters as you scan the photo. They offer to colour balance and reduce noise but what you often end up with is a mess that doesn’t resemble the original picture.
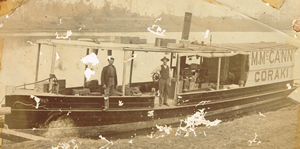
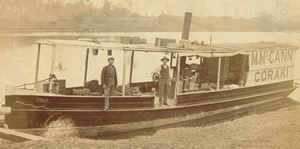
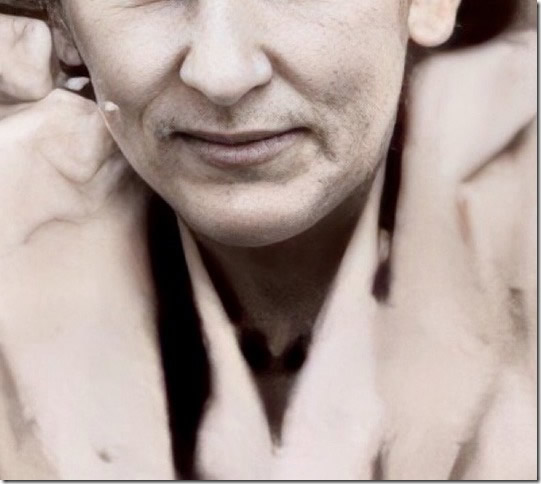
As an example, the lady on the right inherited a beard due to an auto filter.
Turn off all enhance modes in scanner settings – just scan the picture warts and all.
It’s fine to play around with photo filters and airbrushing tools but always use a file copy and not the original scan.
If you have a special photo that you need scanned and restored, please email admin@coraki.town to discuss your options.